Book Appointment Now

Bathroom Remodel Process: Steps, Order of Work, and Timeline
A bathroom remodel is a sequence of dependent jobs, and doing them out of order is how homeowners end up paying twice. Tile laid before the plumbing is finished may have to come up again. A vanity ordered before the layout is final may not fit the drain. Knowing the order of work protects both your budget and your schedule.
The stakes are higher because a bathroom is often the only one in the house. Every day the room is out of service affects daily routines, so delays carry a real cost beyond money. Early decisions shape everything that follows: the scope of work, the budget, whether you hire a licensed contractor or do part of the work yourself, and which building codes and permits apply.
This guide follows the project from first idea to final walkthrough. It covers planning and design decisions, permits and material orders, the correct sequence of construction, realistic timelines, the common causes of delay, and what daily life looks like while the work is underway.
What Is the Bathroom Remodel Process?
The bathroom remodel process is the sequence of planning, design, permits and ordering, demolition, rough-in work, finishing, and a final walkthrough that takes a bathroom from its current state to a completed room. Each stage depends on the one before it.
How much of that sequence you need depends on the type of project. A cosmetic update keeps the existing layout and replaces surface items such as paint, hardware, a faucet, a vanity, or a toilet. A full remodel replaces major fixtures and finishes and may relocate plumbing, which adds design, permit, and construction work. A gut renovation strips the room back to the framing so that walls, plumbing, wiring, and floors can all be rebuilt. Demolition depth varies even within full remodels; some projects remove only the shower and tub area, while others clear the entire room.
Several people may be involved: you as the decision maker, a designer, a general contractor or project manager, plumbers and electricians (often called trade partners), tile installers, and a building inspector. For cost detail, see the dedicated bathroom remodel cost article.
The core sequence runs as follows:
- Plan the goals, scope, budget, and who will do the work.
- Finalize the design and choose materials and fixtures.
- Order materials and obtain permits.
- Demolish and prepare the site.
- Complete rough-in plumbing, electrical, and framing.
- Install walls, waterproofing, and flooring.
- Set the fixtures, then finish with paint, trim, and accessories.
- Complete the final walkthrough and punch list.
Phase 1: Planning Your Bathroom Remodel
Planning is the stage where most outcomes are decided. Layout, budget, schedule, and the level of disruption are all largely fixed before any wall is opened, so decisions made here carry more weight than anything done on site.
A good project plan comes before browsing fixtures and finishes. Set your goals, scope, budget, and approach to hiring first, then meet with a designer or contractor for a design consultation and a preliminary budget. Working in that order reduces surprises once construction begins, because choices about tile or faucets are made inside limits you have already defined.
Define Your Goals and Wish List
To define your goals, list what is wrong with the current bathroom and what you want the new one to do. Assess storage, layout, fixture condition, moisture problems, and ventilation before choosing finishes.
Consider who uses the room. A bathroom for young children, guests, or someone with limited mobility has different needs than a primary suite. Universal design features, such as a curbless shower, grab-bar blocking in the walls, and good lighting, are easier to include now than to add later. Then separate must-haves from nice-to-haves. Fixing a poorly ventilated room is a must-have; a heated floor may not be.
Collect inspiration photos in one place, such as a single folder or mood board, so you can refer to them when decisions pile up. Online design tools help you test layouts, and showrooms let you see how faucets, handles, and fixtures feel in your hand. A simple wish list might read: walk-in shower, double vanity, more storage, quieter exhaust fan, warm-toned tile.
Decide on the Scope and Layout
Scope is the amount of change you plan to make, and the biggest scope decision is whether to keep or move plumbing. Relocating toilets, showers, and drains raises complexity because pipes, venting, and sometimes framing and flooring must change to match.
Other layout choices include converting a tub to a shower, sizing the vanity, and using the available space well. Each choice affects what trades are needed. The scope falls broadly into three levels:
- Cosmetic: paint, fixture swaps, new hardware or lighting in the existing layout. This is the most economical and fastest option.
- Partial: a new vanity, toilet, or shower surround while keeping the existing plumbing positions.
- Full: new layout, relocated plumbing and electrical, and new walls and floors, which costs more and takes longer.
Scope also determines which permits apply and how long the work takes, so it should be settled before design details.
Set a Budget
To set a budget, decide early on a total you are willing to spend, divide it among the main components, and keep a contingency of roughly 10 to 20 percent for surprises such as hidden damage.
The main categories typically include:
- Labor and installation fees
- Plumbing and electrical work
- Vanity and countertop
- Tile and flooring, including its installation
- Shower or tub and fixtures
Costs for the vanity, faucet, tile, and shower shift with material choices, so reserve a specific amount for each. Budget flooring installation separately from the material, since labor can be a large part of the total. Budgets most often run over when walls reveal damage or when selections change after work starts. The bathroom remodel cost article covers pricing in detail.
Choose DIY or Hire a Professional
Choose DIY for simple, low-risk tasks and hire licensed professionals for plumbing, electrical, waterproofing, and extensive tile. Painting, replacing hardware, and swapping a faucet or light fixture suit many homeowners.
Work that affects water, wiring, or building codes carries higher stakes. Errors in plumbing or waterproofing can cause leaks and hidden damage, and electrical work near water has safety implications. Many jurisdictions require licensed trades or inspections for this work. Some homeowners handle demolition and painting themselves and hire out the technical middle.
When hiring a contractor, compare written estimates on scope and timelines, not just price. A lower bid may leave out items that a higher one includes. For a hiring guide, see the dedicated bathroom remodeler article. Use this checklist when evaluating contractors:
- Valid license and proof of insurance
- Reviews and references from similar projects
- Written estimate listing scope, materials, and schedule
- Warranty terms and how change orders are handled
- Responsiveness during the quoting process
Phase 2: Design, Materials, and Permits
This phase turns your plan into a finished design, a materials order, and the approvals needed to start. The design should be final before materials are ordered or construction begins, because changes after that point cost time and money.
Finalize the Design and Select Materials and Fixtures
To finalize the design, choose every major element, including tile, flooring, vanity, countertop, toilet, shower or tub, faucets, lighting, and ventilation, and confirm them on a drawn plan. Review and approve the design before moving forward.
Fixture choices determine rough-in dimensions, which are the positions of supply lines, drains, and electrical boxes. A toilet’s rough-in distance, the type of sink, and the valve for the shower must be compatible with the plumbing in the wall. Selecting fixtures after the walls are closed can force expensive changes.
Moisture is the main material concern. Use water-resistant flooring and wall materials in wet zones, such as cement board in showers, moisture-resistant drywall elsewhere, and waterproof paint. Outlets need GFCI protection. Match finishes to your design theme, and check how easy each is to clean.
| Element | Key decision |
|---|---|
| Tile and flooring | Water resistance, slip resistance, cleaning needs |
| Vanity and countertop | Size, sink type, compatibility with plumbing |
| Toilet | Rough-in distance and fit with existing drain |
| Shower or tub | Size, valve type, wall material behind it |
| Lighting and ventilation | Wet-rated fixtures, task lighting at the mirror, fan capacity |
Order Materials and Check Lead Times
Order materials well before the start date, ideally before demolition, so that construction does not stall waiting for deliveries. Custom vanities, glass, and specialty tile often have long lead times and may be backordered.
Verify quantities carefully so you neither run short nor overbuy, and add a small allowance for cuts and breakage on tile. Review each supplier’s return policy and warranty before purchasing. When items arrive, inspect them for damage and confirm they match your order, since discovering a problem weeks later may make a return impossible.
Get Permits and Approvals
Permits are typically required when you move plumbing, add or change electrical circuits, or alter structure. A building permit lets the local jurisdiction review the work and inspect it for code compliance.
Some permits are issued over the counter with no drawings, while complex projects require plan submission and review. Review times depend on how busy the jurisdiction is, so rules and timing vary by location. Check with your local building department about what applies. A contractor usually handles the application, but confirm who is responsible.
Unpermitted work carries risks. It may not meet safety standards, could complicate an insurance claim, and may cause problems or require corrections when you sell the home.
What Is the Correct Order to Remodel a Bathroom?
The correct order is demolition, rough-in plumbing and electrical, walls and waterproofing, flooring, major fixtures, paint and trim, and a final walkthrough. Work that is hidden inside walls must come before anything that closes them, and delicate finishes come last.
The reasoning is practical. Plumbing and electrical updates occur before walls are closed, wet surfaces are waterproofed before tile, and paint, hardware, mirrors, and lighting go in last so they are not damaged by heavier work.
Demolition and Site Preparation
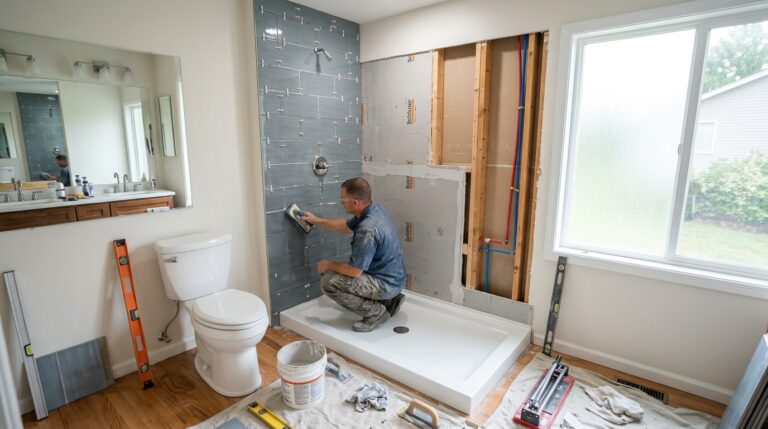
Demolition begins by shutting off the water and protecting adjacent areas, then removing the vanity, toilet, tub or shower, tile, flooring, and in some projects the drywall. Dust barriers and plastic walls help contain debris, and some contractors use a negative air machine to pull dust out of the work area.
Demolition is also an inspection opportunity. Removing surfaces can reveal rot, mold, or outdated wiring that was invisible before. Disposal of debris is part of this stage. Finding hidden damage early lets it be repaired before new materials cover it, though it may add cost and time.
Rough-In Plumbing, Electrical, and Framing
Rough-in is the installation of the hidden supply lines, drains, vents, wiring, and any framing changes before walls are closed. Relocated drains, new shower valves, and new circuits are completed here.
Proper venting matters because it keeps sewer gases from entering the bathroom after fixtures are installed. Electrical work should include GFCI protection, and the circuit load should be checked to see whether the panel needs an upgrade. Inspections typically occur at this stage because inspectors need to see the pipes and wires before drywall covers them. A failed inspection means corrections before work can continue.
Walls, Waterproofing, and Flooring
After rough-in approval, install insulation if needed, then moisture-resistant drywall or cement board, and apply waterproofing membranes in shower and tub areas. Wet walls need materials that can handle constant humidity.
Flooring follows. Underlayment affects comfort, insulation, and sound transmission. Tile and flooring must be installed according to the manufacturer’s directions, and thinset, grout, and sealants need curing time before they are used or exposed to water. Grout and sealants must withstand frequent water exposure, so rushing this step can cause failures later.
Installing the Tub or Shower, Vanity, and Toilet
Major fixtures go in once plumbing, electrical, walls, and floors are ready, with the tub or shower first because it is the largest and most difficult to maneuver. The vanity follows, with the countertop template and installation if it is a separate piece.
Verify that the vanity and sink are compatible with the plumbing before installing, and check whether the toilet needs a new rough-in or fits the existing one. The toilet and faucets go in last among the fixtures because they are easiest to damage and are not needed to complete the tile and cabinet work.
Painting, Trim, and Final Finishes
Paint, trim, mirrors, accessories, and lighting are installed after major work is complete, and caulking and sealing close the joints where water could get in. Washable paint and wipeable tile simplify long-term cleaning.
Use wet-rated fixtures where needed and task lighting beside the mirror, which reduces shadows for grooming. Dimmer switches add flexibility.
Final Walkthrough, Punch List, and Warranties
The final walkthrough is a close inspection of the finished room against your contract and design. Test faucets, drawers, doors, the fan, and lighting, and check tile, caulk, and paint for defects.
Record problems on a punch list with the contractor and resolve them promptly. Confirm that the final inspection has passed, and time the final payment to the completion of the punch list. Collect warranty documents and care instructions for fixtures and finishes. Some warranty terms, such as a home warranty program for remodelers, may transfer to a new owner if you sell.
- Run every fixture and check for leaks
- Compare finished work with the contract
- Agree on a written punch list
- Collect warranties and care guides
How Long Does a Bathroom Remodel Take?
Construction itself often takes a few weeks, but the whole project, including planning, design, permits, and ordering, can take months. A cosmetic update is much shorter than a full remodel with layout changes.
The wide range comes from the work that occurs before and around construction. Design and permit approval are often outside the contractor’s direct control, and material availability can decide when work begins. The sections below break the timeline into phases and explain what stretches it.
Typical Timeline by Phase
A typical full remodel includes design and planning of roughly 2 to 4 weeks, permits and approvals of roughly 30 to 45 days, and construction of roughly 3 to 5 weeks. These are approximate, and local factors apply to every project.
| Phase | Typical duration | What happens |
|---|---|---|
| Design and planning | About 2 to 4 weeks | Assessment, design, selections, budget |
| Permits and approvals | About 30 to 45 days | Application, plan review, approval |
| Ordering | Varies with lead times | Materials ordered and delivered |
| Construction | About 3 to 5 weeks | Demolition, rough-in, installation, finishes |
| Walkthrough | Days | Punch list and final touches |
Ordering often overlaps with permit review, which can shorten the total.
Factors That Affect the Timeline
Bathroom size, scope, layout changes, custom materials, contractor availability, permits, and hidden damage are the main factors that affect the timeline.
- Size and scope: larger rooms and fuller remodels require more work.
- Layout changes: moving plumbing adds rough-in work and inspections.
- Custom materials: made-to-order items extend lead times.
- Contractor availability: trade partner schedules affect start and finish dates.
- Permits: plan review time depends on the jurisdiction.
- Hidden damage: water damage or structural surprises add unplanned repair time.
Common Delays and How to Avoid Them
The most common delays are backordered materials, change orders, failed inspections, subcontractor scheduling conflicts, and surprises behind walls. Most can be reduced with early decisions and a time buffer.
- Backorders: finalize selections early, order ahead, and keep a buffer for delivery problems.
- Change orders: frequent design changes raise both cost and time, so settle the design before construction.
- Failed inspections: use qualified licensed trades and schedule inspections ahead of closing walls.
- Subcontractor scheduling: choose a contractor who coordinates trades and confirm the sequence in writing.
- Hidden damage: get a professional assessment before starting and budget for possible structural repairs.
Even with preparation, plan for some slippage, and avoid scheduling events, such as guests arriving, immediately after the expected completion date.
What to Expect During Construction
Expect noise, dust, and interrupted routines. Some disruption is unavoidable despite dust control measures, and demolition in particular is noisy and messy, though it is a necessary part of the process.
Temporary water or electricity shutoffs may occur during plumbing and electrical work. Knowing what is coming, and arranging your household around it, makes the weeks of construction considerably easier.
Living Without Your Bathroom
Plan alternate bathroom access before demolition begins. If there is a second bathroom, use it; if not, arrange temporary access, such as a portable option, a neighbor or relative’s home, or a gym for showers.
Work zones and dust barriers keep living areas separate from the construction area. Ask the contractor about working hours and schedule water shutoffs around household routines where possible, such as outside morning showers. Keep pets and children away from the work zone, and move or cover belongings in nearby rooms to protect them from dust. Tools, tile, and open floors present hazards that are best kept out of reach.
Communication and Staying on Schedule
Regular progress updates and a single point of contact, such as a dedicated project manager who coordinates trade partners, keep the project on schedule.
Agree on how often you will receive updates and how change orders are handled. Approve changes in writing so cost and time effects are clear before the work proceeds. Quick decisions on questions that come up, such as a fixture substitution or a hidden problem, prevent crews from waiting.
Bathroom Remodel Process FAQs
How Much Does a Bathroom Remodel Cost on Average?
Costs vary with bathroom size, scope, materials, fixture count, floor plan changes, and regional labor pricing. In the United States in 2025, the national average for a midrange bathroom remodel was about $26,138. One-day or liner-style remodels are a lower-scope option that covers surfaces rather than a full rebuild. See the dedicated cost article for detailed pricing.
Does a Bathroom Remodel Add Value to a Home?
A bathroom remodel typically recovers part of its cost at resale rather than all of it. Cost-versus-value figures for 2025 put the average return on a midrange remodel at about $20,915, roughly 80 percent of the cost. Return depends on the scope of the remodel and on local market factors.
Can I Stay in My Home During a Bathroom Remodel?
Yes, staying is feasible when a second bathroom remains usable. If the remodeled bathroom is your only one, arrange temporary access in advance, and use dust barriers and work zones to keep living areas usable.