Book Appointment Now

How to Plan a Kitchen Remodel: Step by Step Process
To plan a kitchen remodel, define your goals and budget first, then design the layout, choose appliances and finishes early, and confirm permits and your team. Only after those decisions are made should construction begin, following a fixed order of trades from demolition through final fixtures. This sequence keeps decisions on paper, where changing your mind costs nothing, instead of in a gutted room. Pre-construction planning is what separates smooth projects from expensive, drawn-out ones.
Planning before demolition protects you from three common problems: cost overruns, backorder delays, and rework. Overruns happen when a budget lacks a reserve or a clear scope. Delays happen when cabinets, counters or appliances are ordered after walls are open. Rework happens when a trade installs something that the next trade must tear out because dimensions or sequence were never confirmed.
The project has two distinct phases. The planning phase covers goals, budget, layout, selections, permits and hiring, while the construction phase covers the physical work. How much you manage yourself also shapes the process. A DIY project puts every scheduling and code decision on you, while a contractor-led or design-build project shifts coordination to professionals. Either way, the planning steps stay the same and should be settled before work starts.
Define Your Remodel Goals and Scope
To define your remodel goals and scope, identify what the current kitchen fails to do, then decide whether the project is a cosmetic refresh or a full reconfiguration. Goals should come from daily use, such as limited counter space, poor lighting, or too little storage, rather than from photos of finished kitchens. A clear goal statement makes every later choice easier to judge. It also gives contractors a precise basis for bidding.
Begin by assessing what works and what fails in the existing room. Walk through a normal cooking day and note where you run out of counter space, where storage is awkward, and where lighting is too dim for prep work. Note what works, too, such as a well-placed sink or a sensible walkway, because keeping good elements saves money. These observations turn vague dissatisfaction into specific problems to solve.
Scope is the main driver of cost, permits and timeline. A cosmetic refresh means new cabinet doors, hardware, paint and lights within the existing footprint, with no permits or structural work. A full reconfiguration moves walls, appliances or plumbing and often adds custom cabinetry and high-end finishes. A cosmetic refresh costs considerably less than that kind of reconfiguration. Larger scope also adds drawings, inspections and longer schedules.
Examples help sort priorities. Must-haves are usually functional: more counter space, better task lighting, adequate storage, and a workable layout. Nice-to-haves are typically upgrades such as premium stone, decorative tile, specialty fixtures, or a statement range hood. Writing both lists early prevents scope from creeping upward once you start browsing showrooms. The next step shows how to rank them when money gets tight.
- Must-haves: counter space, lighting, storage
- Nice-to-haves: premium stone, decorative tile, specialty fixtures
How Do You Separate Must-Haves From Nice-to-Haves?
To separate must-haves from nice-to-haves, list the essential lifestyle needs first, such as counter space, lighting, storage and function, then label cosmetic wishes like finishes and upgrades as optional. A must-have solves a problem you face while using the kitchen. A nice-to-have improves appearance or adds luxury but does not change how well the room works. Ranking goals this way guides every later decision.
Rank your priorities before choosing any materials. Once the list exists, each product can be tested against it. If a design choice does not support a top-ranked need, it should wait until the essential items are fully funded. Listing must-haves focuses the design on what matters most, so the layout is built around real use instead of decorative appeal. This also keeps family members aligned on shared priorities.
Trade-off logic matters most when the budget tightens. Cut from the bottom of the list first, starting with finishes and decorative upgrades. Protect the items that affect daily function, such as lighting, storage planning and workable counter space. For example, you might choose a mid-range surface and keep the improved lighting plan rather than the reverse. A ranked list makes those compromises quick and consistent instead of stressful.
Set a Realistic Kitchen Remodel Budget
A realistic kitchen remodel budget starts with your scope, then adds a 10% to 15% contingency for hidden surprises behind walls or floors. There is no single fixed price, because cost depends on scope, kitchen size, finish level and material tier. Angi puts the average kitchen remodel at $26,934, but that figure hides a wide spread. Your own scope matters far more than any national average.
Reported costs range from about $14,600 for a small kitchen to $41,485 for a bigger renovation. That gap reflects how much choices differ: a small refresh with existing cabinets sits at one end, while larger layouts, custom cabinetry and high-end finishes push toward the other. Use these numbers as reference points, then build your own total from the decisions you have made about scope and materials. Getting several itemized bids refines the figure.
The contingency fund is not optional padding. Old walls and floors can conceal water damage, outdated wiring or uneven subfloors that only appear after demolition. Setting aside 10% to 15% of the total means those discoveries become manageable repairs instead of reasons to stop work or downgrade materials. Treat the reserve as separate from the main budget and do not spend it on upgrades. If it remains unused, it simply becomes savings.
You can save without lowering quality by prioritizing where money goes. Keeping the existing layout avoids relocating plumbing and gas lines, and choosing mid-range finishes keeps costs in check. Quartz is a good example, since it gives a marble appearance at lower cost. Spend more on elements that carry the kitchen, such as cabinetry and appliances, and economize on surfaces that are easy to replace later.
How Should You Allocate a Kitchen Remodel Budget by Category?
A typical kitchen remodel budget splits into cabinetry and hardware at 30% to 35%, labor at 20% to 25%, appliances and ventilation at 15% to 20%, countertops at 10% to 15%, and flooring, lighting and plumbing at 5% to 10% each. These shares are typical ranges, not rules. Adjust them to match your priorities and the work your kitchen needs. The ranges add flexibility because no kitchen spends exactly the same on every category.
Use the table as a starting point, then shift money toward the categories that affect daily function. Avoid overspending on high-end finishes if doing so forces you to accept lower-quality cabinetry or appliances, since those items carry the most use and the most expense. A beautiful surface cannot compensate for poorly built cabinet boxes or an unreliable range. If you do much of the labor yourself, labor’s share can shrink and fund better materials.
| Category | Typical share |
|---|---|
| Cabinetry and hardware | 30%-35% |
| Labor | 20%-25% |
| Appliances and ventilation | 15%-20% |
| Countertops | 10%-15% |
| Flooring, lighting, plumbing | 5%-10% each |
Design the Kitchen Layout and Workflow
To design a kitchen layout and workflow, choose a layout shape that fits your room dimensions, then arrange zones so cooking, prepping and cleaning connect smoothly. Layout determines how easily you move between those zones during real use. A well-fitted plan reduces wasted steps, avoids crowded walkways, and makes storage easier to reach. This is where the goals you set earlier become a physical arrangement.
Keeping your existing layout can likely save money. When the sink and stove stay roughly where they are, plumbers and electricians avoid rerouting supply lines, drains, gas and wiring. Moving walls adds cost because it brings framing, possible structural review, patching and, often, permits. If the current arrangement mostly works, improving cabinets and lighting inside it usually delivers more value than relocating major stations. Reserve layout changes for problems that cannot be solved otherwise.
Draft scaled plans before committing. Graph paper or 3D planning tools such as SketchUp or HomeByMe let you map cabinet gaps, appliance clearances and walkways. Drawing at scale exposes conflicts, such as a door that swings into a drawer, while they are still easy to fix. These drawings also give your cabinet maker and contractor a shared reference. The plan then guides every purchase that follows.
Which Kitchen Layout Fits Your Room: U-Shape, L-Shape or Galley?
The right kitchen layout depends on room size: U-shape suits medium to large rooms with clear walkways, L-shape works in kitchens of all sizes, and galley maximizes smaller spaces. Compare them by room size, traffic, island potential and the number of cooks. Each shape trades storage, openness and efficiency differently. The table summarizes those differences.
A U-shape uses three walls for storage and appliances, giving the most cabinet capacity, but it needs enough floor width to keep walkways clear. An L-shape uses two adjoining walls, which creates open flow and makes use of corners. That openness suits open-concept homes and leaves room for a table or island when space allows. Both shapes keep core stations close together.
A galley places parallel counters on opposite walls, which is efficient for narrow rooms and keeps stations near each other. The limit is that a galley can feel cramped, with little storage and little space for more than one cook. Measure your room, note where doors and windows sit, and test each shape on a scaled plan. Choose the one that fits your dimensions without squeezing walkways or forcing appliance doors to collide.
| Layout | Best fit | Strength | Limit |
|---|---|---|---|
| U-shape | Medium to large | Storage | Needs width |
| L-shape | Any size | Open flow | Fewer walls |
| Galley | Narrow | Efficient | Cramped |
How Does the Work Triangle Improve Kitchen Function?
The work triangle improves kitchen function by keeping a smooth, comfortable distance between the three core stations: the stove, refrigerator and sink. When these stations are close enough to reach easily but not crowded, you travel less while cooking and cleaning. Keep walkways between them free of obstructions, such as a protruding island corner or an open dishwasher door. The goal is steady movement without detours.
The triangle has limits. In large kitchens, the stations can drift too far apart, making the idea less useful. Multi-cook layouts and islands also change how people move, since two people may need separate paths or additional stations. Treat the triangle as a planning guide rather than a strict formula. Test it on your scaled drawing by tracing the routes you take when preparing a typical meal.
Choose Cabinets, Countertops and Finishes
Choose cabinets first, then countertops and finishes, by balancing storage needs, budget, durability and maintenance. Cabinets shape the kitchen’s function, so plan storage and hardware carefully. Custom cabinets give tailored storage that fits unusual spaces and specific needs, while premade cabinets are typically more budget-friendly. Cabinetry and hardware also take the largest share of a typical budget.
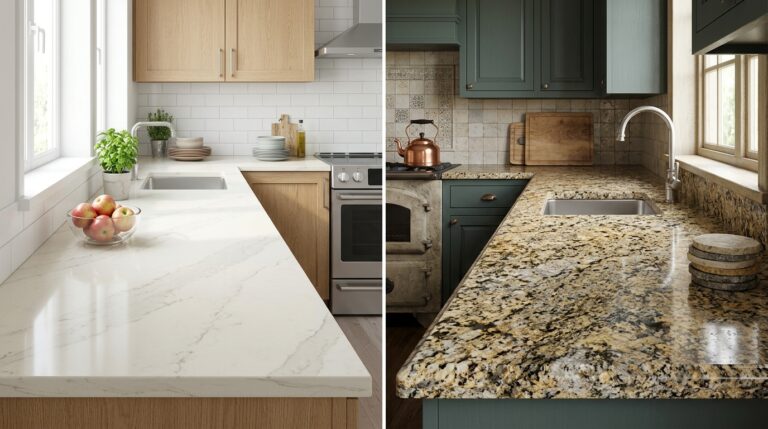
For countertops, quartz is low-maintenance and durable, while granite offers a more luxurious look. Quartz also gives a marble appearance at lower cost, which suits budget-conscious projects. Decide on the surface early, because solid-surface counters depend on templating, which can only happen after cabinets are installed. Order lead times also affect your schedule, so selection should not wait.
Backsplash selection follows the counters, since the tile has to meet the finished surface. Choose a design with grout lines and cleaning needs in mind, particularly behind the sink and range. Coordinate its color and texture with the countertop sample rather than judging each in isolation. Seeing samples together in your kitchen’s actual lighting prevents mismatches.
Flooring, tile, fixtures and lighting should balance durability and maintenance. Kitchens face spills, foot traffic and heat, so surfaces that resist moisture and wear usually serve better over time. Lock in these choices early so special orders arrive before installers need them. Lighting should also reflect the task-focused goals you set earlier, supporting prep areas and counters.
Select Appliances Before Finalizing Cabinets
Select appliances before finalizing cabinets by choosing the exact refrigerator, range and dishwasher models early. Each model has its own cutout dimensions, and your contractor and cabinet maker need those numbers to build openings that fit. Guessing risks gaps, tight squeezes or cabinets that must be altered. Appliance specifications should be fixed before cabinet orders are placed.
Ventilation needs attention at the same stage. Range hood sizing and clearances above the cooking surface affect upper cabinets and wall layout. If the hood is chosen late, the cabinet plan may need to change after boxes are built. Confirm the model’s dimensions and installation requirements with your installer. Appliances and ventilation typically account for 15% to 20% of the budget, so they warrant careful early planning.
Energy efficiency is another factor. An Energy Star side-by-side refrigerator may cost more upfront but can save money over time. Weigh purchase price against ongoing use when deciding where to spend. Efficient models can justify higher spending if you plan to keep the kitchen for years. Record each model number alongside its dimensions in your plan.
Order finishes in advance too. Lock in countertops, tile, flooring and fixtures early to prevent custom backorder delays. A single missing item can stall a trade and push back everything that depends on it. Early ordering also lets you inspect deliveries for damage while there is still time to replace them. Storing materials safely before construction keeps the schedule moving.
Check Permits and Decide Who Will Do the Work
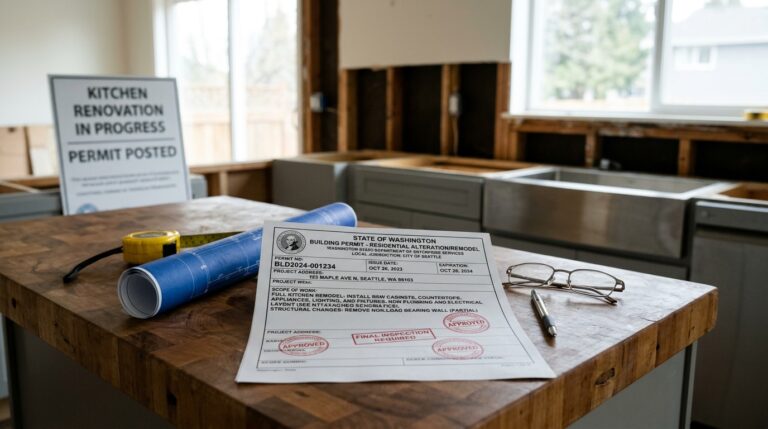
Check local building codes before work begins, because permits are typically required for electrical work, plumbing moves, structural changes or added square footage. Moving gas, electrical or load-bearing walls requires formal municipal permits. Cosmetic updates in the existing footprint usually avoid them, but rules vary by location. Confirm requirements with your local building department before finalizing the scope.
Permit review takes time. In the Charleston area, review typically takes eight to twelve weeks. That wait should be built into your schedule so demolition does not begin before approval. Starting work without required permits can lead to stopped projects, fines or problems when selling the home. Submitting complete drawings helps avoid review delays.
Decide who will do the work: you, a general contractor, or a design-build firm. The right choice depends on your skills, available time, tolerance for risk and willingness to coordinate trades. Whichever approach you choose, licensed professionals should handle electrical, plumbing and HVAC work for code compliance. The following subsections cover when to involve design professionals and how the three approaches compare.
Situations that call for permits or professional input include several common scenarios. Rewiring or adding circuits, relocating a sink or gas line, removing a wall, and expanding the footprint each trigger review. These changes affect safety, so inspectors verify them. Listing them early shows whether your project needs drawings, engineers or extra lead time.
- Electrical work
- Plumbing moves
- Structural changes
- Added square footage
Do You Need an Architect or Structural Engineer for a Kitchen Remodel?
You need an architect or structural engineer when the remodel involves structural changes, wall removal or major reconfiguration. An architect creates permit-ready drawings and ensures structural changes are safe and code compliant. A structural engineer evaluates whether a wall carries load and specifies support if it is removed. These professionals protect both the house and the permit application.
They are usually not needed for cosmetic or same-footprint updates, such as new doors, hardware, paint and lights. Local rules vary, so confirm with the building department what documentation your project requires. If your plan changes walls or layout, engage a professional before ordering cabinets, because their drawings may alter dimensions. Early input prevents redesign after materials are purchased.
How Do You Choose Between DIY, a General Contractor and Design-Build?
Choose by weighing skill, time, risk, cost and coordination load. DIY offers the most control and lowest labor cost but the highest risk, a general contractor coordinates trades, and design-build combines design and construction under one firm. The more complex the scope, the more value coordination provides. Licensed trades are still needed for electrical, plumbing and HVAC. The table compares the approaches.
Vet any professional carefully. Ask for references and recent clients, confirm licensing, and judge how clearly they communicate during the bidding process. Warning signs include unclear terms for changes and payments. Written agreements covering house rules and payment schedules prevent misunderstandings about work hours, site access and when money is owed. Vague contracts often lead to disputes later.
Be honest about your coordination load. Scheduling trades, ordering materials and managing inspections demand time, and mistakes in sequence cause rework. A DIY approach suits those with relevant skills and flexibility, while a contractor suits busy owners with moderate projects. Design-build fits complex changes that benefit from one point of responsibility. Pick the model that matches your scope rather than your hopes for savings.
| Approach | Control | Cost | Risk |
|---|---|---|---|
| DIY | Highest | Lowest labor | Highest |
| General contractor | Shared | Moderate | Moderate |
| Design-build | Lower | Higher | Lowest |
What Is the Correct Order of Kitchen Remodel Steps?
The correct order is demolition, prep and rough-ins, paint, flooring, cabinets, countertops and backsplash, then fixtures and appliances. Each trade should finish before the next depends on its work. This keeps finished surfaces from being damaged and avoids tearing out completed work. The numbered list shows the sequence.
Common mistakes involve ordering out of sequence. Painting after cabinets leaves messy edges and hard-to-reach areas. Late measurements cause countertop or appliance fit problems, because templates and cutouts need accurate dimensions. Installing fixtures before dusty work risks damage. Following the sequence reduces these errors.
Sequence also supports scheduling. Trades can be booked in order, and materials can arrive just before they are needed. Delays in one step ripple forward, so confirming deliveries and inspections ahead of time keeps the project moving. The next three subsections describe each stage in detail. Treat the sequence as a checklist for coordinating everyone on site.
- Demolition
- Prep and rough-ins
- Paint
- Flooring
- Cabinets
- Countertops and backsplash
- Fixtures and appliances
Demolition, Prep and Rough-Ins
Demolition starts by shutting off gas, water and electricity breakers, then removing old cabinets and flooring. This protects everyone on site from hazards. Afterward, repair drywall and prepare the subfloor so later finishes have a sound base. Clear debris to expose any hidden damage.
Rough-ins come next. Electrical, lighting, plumbing and HVAC are handled early by licensed professionals for code compliance. Running new lines while walls are open is easier and cheaper than cutting into finished surfaces. Inspections often occur at this stage. Keeping the sink and stove roughly in place reduces the demolition and rough-in work required.
Painting, Flooring and Cabinet Installation
Paint walls after demolition but before cabinets, backsplashes and appliances, for cleaner edges. Prime and paint ceilings and upper walls first, since cabinets later block access. Painting early also avoids drips on new surfaces. Touch-ups can wait until the end.
Flooring comes next. The subfloor should be clean and level, and underlayment smooths minor imperfections, reduces noise and adds stability. Install primary flooring across the room, then stock your installation materials. Mount base and wall cabinets using laser levels so lines stay true. Accurate cabinet placement sets up countertops and appliances that follow.
Countertops, Backsplash, Fixtures and Appliances
Template and install solid-surface counters after cabinets are set, then add the backsplash. Templating measures the installed cabinets exactly, so counters fit. Backsplash follows because tile must meet the finished countertop edge. Leave adequate time for fabrication.
Install hardware and fixtures last to protect them from damage, dust or paint. Hook up the sink, faucet, range and dishwasher, then add final hardware and lighting. Test each connection for leaks and function. Final adjustments complete the kitchen.
How Long Does a Kitchen Remodel Take?
A complete kitchen remodel takes six to twelve months from the first conversation to a finished kitchen. Most of that time is spent before and around construction. Planning and ordering lead time are separate from construction time, so counting only the build phase underestimates the schedule. Timelines grow with scope.
The design and drawings phase takes six to ten weeks. Then come permit review, bidding and construction. Thorough planning between final design and a finished kitchen can take three to six months. Construction for a mid to large renovation typically takes eight to sixteen weeks, depending on scope.
Delays commonly come from backorders, permits and hidden damage. Charleston-area permit review alone typically takes eight to twelve weeks. Ordering finishes early and keeping your contingency available reduces the effect of surprises. Build flexibility into your schedule rather than a fixed move-in date.
Living through the remodel also takes planning. Set up a temporary kitchen away from the work zone, expect dust and noise, and plan for disruption to routines. Written agreements about work hours and house rules help. Knowing the timeline in advance makes the disruption easier to manage.
Common Kitchen Remodel Planning Mistakes to Avoid
The most common planning mistakes are ignoring permits, moving plumbing needlessly, setting unrealistic scope, choosing appliances late, and communicating poorly with contractors. Each can be fixed with a planning step before demolition. The list pairs each mistake with its consequence. Addressing them early costs far less than correcting them mid-project.
Underestimating costs or ignoring unexpected expenses causes overruns. Skipping the 10% to 15% contingency leaves hidden wall or floor surprises unfunded. Set the reserve before bids arrive. A realistic budget also tracks each category.
Vague plans lead to change orders, which add cost and delay. Detailed drawings, confirmed appliance models and written agreements prevent them. Late appliance choices cause cabinet openings to be wrong. Weak communication allows small misunderstandings to become disputes.
Avoid prioritizing style over function, neglecting storage or choosing trendy designs. A kitchen that looks current but lacks storage or workable counters frustrates daily use. Return to your ranked must-haves whenever a stylish option tempts you. Timeless choices also hold up better as trends change.
- Ignoring permits: stopped work
- No contingency: overruns
- Vague plans: change orders
- Style over function: poor daily use