Book Appointment Now

How to Plan Your Bathroom Remodel Project: The Proper Way
To plan a bathroom remodel, define the scope, set a strict budget, draw the layout and choose core fixtures before any demolition begins. That order matters because scope drives cost, layout drives plumbing, and fixture specifications decide where pipes and wiring must sit once walls are open. Every bathroom needs this planning, whether it is a tiny powder room or a large primary bath. Skipping it usually produces change orders, delays and mismatched materials.
Remodels fall into three broad levels: a cosmetic refresh, a wet-area replacement such as a new shower or tub, and a full gut. Each level changes the trades involved, the disruption and the chance of finding hidden damage. Your decision to do the work yourself or hire a contractor also shapes the schedule, permit needs and the points where mistakes become expensive, especially waterproofing and plumbing.
A floor plan is the best first drawing, because it shows how fixtures, door swings and clearances fit together. The RoomSketcher App can draft floor plans, test materials and preview your style in 3D, which helps you spot problems on screen rather than after tile is set. Once the drawing, budget and fixture list agree, you can move on to materials, code requirements and the build sequence.
Define the Scope of Your Bathroom Remodel
Defining the scope means deciding how much of the bathroom you will change: a cosmetic refresh, a wet-area replacement, or a full gut. The cosmetic end covers paint, lighting and a new mirror. A full structural gut renovation is the broadest scope, opening walls and floors to the framing, so it carries the most cost, the longest timeline and the most trades.
Scope affects cost, timeline, permits and trades in a predictable way. Surface updates rarely need inspections and can often be done by one person over a short period. Moving or replacing plumbing and electrical components usually brings in licensed trades and local building codes, while a gut project adds demolition, rough-in work, inspections and a longer sequence of dependent steps.
Match the scope to your goals, your DIY skill and the bathroom’s size. If the problem is dated finishes, a refresh solves it. If the problem is a failing shower, a wet-area replacement targets it. If the layout, storage or accessibility fail, only a gut allows you to reshape the room.
Cosmetic Refresh vs Wet-Area Replacement vs Full Gut
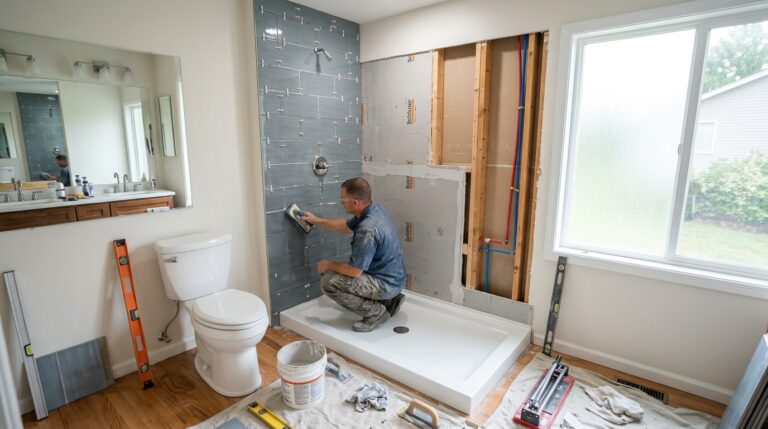
A cosmetic refresh changes surfaces, a wet-area replacement swaps the shower or tub, and a full gut strips the room to its framing. Disruption rises at each step, and so does labor. Hidden-damage risk rises too, because damaged plumbing, electrical or subfloor is often unseen until work starts, which makes wet-area and gut projects the likeliest to surprise you.
In a full gut, framing, plumbing and electrical are all exposed, so you can correct problems and reposition fixtures. A wet-area replacement is narrower but still opens the area around the shower or tub, where moisture damage tends to hide. A refresh leaves walls and floors intact, so it is the quickest and least invasive, but it cannot fix layout or concealed problems.
DIY or Hire a Contractor
Experienced DIYers can handle some of the work, while most people should hire a contractor for plumbing, electrical and waterproofing. Novice DIY work can damage plumbing, electrical systems, flooring or walls, and a leaking shower may stay hidden until the damage is extensive. A weekend project is possible for experienced DIYers, but check local building codes first.
A hybrid approach often works well: hire licensed trades for plumbing and electrical, then do finishes such as painting yourself. Permits and inspections matter here, because code-regulated work may need sign-off, and unpermitted or poorly done work can cause problems later. Decide who does what before you set the schedule and budget.
How to Set a Bathroom Remodel Budget
To set a bathroom remodel budget, add estimated labor and material costs, then include a cushion of 10% for unforeseen expenses. That contingency covers hidden damage found after demolition, such as rotted subfloor or old wiring, which cannot be priced accurately beforehand. Without it, one surprise can force you to cut finishes or stop work.
Separate needs from wants and set a strict spending limit. Needs include working plumbing, waterproofing, ventilation and safe wiring, while wants include premium finishes or decorative extras. This split prevents overspending in one area, such as a luxury faucet that leaves too little for tile or labor.
Keeping the existing plumbing layout is one of the strongest ways to control cost. Moving toilets and drains raises labor and piping costs because plumbers must reroute lines and sometimes open floors or walls. If you keep fixtures where they are, more of your money goes into surfaces you will see and use.
| Component | Planning note |
|---|---|
| Labor | Trades, demolition |
| Materials | Fixtures, tile, paint |
| Cushion | 10% for surprises |
Where to Save and Where to Spend
Save on items that are easy to replace or customize, and spend on waterproofing, plumbing and durable surfaces. A readymade vanity is easy to customize and frees budget padding compared with a custom build. Buying all tile at once, with extra for overage, also avoids paying twice for mismatched batches. These choices protect the budget without lowering quality.
Waterproofing and plumbing are non-negotiable spends, because failures behind finished walls are costly to repair. Durable surfaces are worth paying for in showers and floors, where moisture and daily wear are highest. Decorative upgrades can be reduced or postponed without harming how the bathroom performs.
- Save: readymade vanity, decorative extras
- Spend: waterproofing, plumbing, durable surfaces
Plan the Bathroom Layout and Measurements
Plan the bathroom layout by starting with a floor plan that shows the existing room and the proposed changes. Consider the room’s size, footprint and utility locations, because plumbing stacks, drains and wiring limit where fixtures can go. Drawing both versions makes the cost of each change visible early.
Measure room size, door swings, window placements and vertical clearances. Also measure distances between the toilet, vanity, shower and walls. These numbers show whether a fixture fits, whether a door can open fully, and whether a sloped ceiling or window will interfere with a shower or mirror.
Prioritize function and future accessibility, and avoid overcrowding. Wider clearances and easy-to-enter showers make the room usable as needs change. In smaller spaces, combining a tub and shower can free floor area. A drawing helps you test these ideas before ordering anything.
Keep or Change the Existing Layout
Keep the existing layout unless a change solves a real problem, because moving walls and plumbing can be a major expense. Relocating a toilet or shower means rerouting drains and supply lines, and it may raise structural and code questions. Moving fixtures is justified when the current arrangement is unsafe, inaccessible or unworkable.
Sketch your ideal layout within the existing walls first to check feasibility, costs and timelines. If you want a soaking tub, a contractor should check whether the joists can support the weight of the water and a person. Compare the sketch with your current plan, then decide whether the improvement is worth the added work.
Layout Choices for Small Bathrooms
In a small bathroom, use a combined shower-bathtub or omit the bathtub to save space. A tub may be left out, especially in a tiny bathroom. A combined unit with a neutral palette keeps the room feeling spacious, and clear glass or a space-saving vanity reduces visual clutter.
Door swing matters in tight rooms, since a door that blocks a fixture wastes valuable space. Choose a vanity that suits the footprint and keep finishes consistent to increase openness. One example is a 45-square-foot bathroom remodeled with a steam shower, showing that even compact rooms can support a distinctive feature.
Choose Fixtures, Storage and Style Before Hiring
Choose fixtures, storage and style before hiring because their specifications determine rough-in plumbing and electrical work. Pick the shower valve, drain and vanity cabinet first. Then select the toilet, faucet and other fixtures, so the contractor can quote and install the right connections.
Know the plumbing type and valves before ordering faucets and shower systems. Mismatched parts can force changes inside the wall, which adds labor and delays. Spec sheets list dimensions and connection details that you can check against your layout.
Plan storage with cabinets, a shower niche or other shower storage, and choose a color palette and cohesive finishes. A niche has to be framed and waterproofed, so deciding on it early avoids reworking walls. Consistent finishes also make the room feel intentional rather than assembled piece by piece.
Allow for lead times, since made-to-order items take extra time. Order a bathtub about a month in advance. Delays in large fixtures can hold up the whole schedule, because later steps depend on installing them in the right order.
- Shower valve, drain, vanity first
- Toilet, faucet, storage, finishes next
Shower, Tub and Enclosure Options
Choose a shower pan for space and easy entry, or a tub if you value soaking and resale appeal. Trade-offs include floor space, cleaning effort and buyer preferences. You can keep or refinish an existing tub to save money, and curtains or doors suit different budgets and cleaning habits.
Check measurements before buying a shower door. A sloped ceiling angle can stop a door from opening fully, and the mounting surface must suit the hardware. If you choose a curtain instead, buy the appropriate length so it stays inside the tub or pan.
Lighting Layers and Mirrors
Use at least three light sources: overhead, accent and decorative, all on dimmers. This layered approach supports both tasks and ambiance. Place lighting to suit the vanity, combining task and ambient light so faces are lit evenly for grooming.
Mirrors and lighting should be planned together with vanity placement. Lighted mirrors need electrical supply, and some require dedicated circuits. Deciding on them before walls close lets wiring be positioned correctly.
Select Durable Bathroom Materials
Durable bathroom materials resist moisture, slipping and staining while suiting your style. Porcelain tile works for shower floors instead of porous natural stone like marble, which stains easily. Bathroom flooring can be slippery, so consider traction, especially in tiled showers.
Walls need the same attention. Choose mold-resistant, antimicrobial paint with a sheen suitable for bathrooms. Details such as grout color, subway tile and baseboards affect both appearance and upkeep, so decide them with performance in mind.
Compare materials by moisture resistance, traction and stain resistance. The right choice depends on where it is used: floor, shower or wall. Durable options may cost more at first, but they reduce repair and replacement later.
| Area | Better choice |
|---|---|
| Shower floor | Porcelain tile |
| Walls | Mold-resistant paint |
Tile, Grout and Flooring Choices
Choose practical floor tile with enough traction, and buy all tile at once with 10-15% overage. Different batches can vary in color, and short orders may yield tile with different color or veining. Extra tile also covers cuts, breakage and future repairs.
Light grout makes tile cleaning difficult because stains show readily. Choose a color that hides marks. Heated flooring is an optional upgrade, worthwhile when the bathroom feels cold, and it can be an easy DIY project.
Plan Electrical, Ventilation and Code Requirements
Plan electrical, ventilation and code requirements before walls are closed, since added features increase loads and need correct outlet locations. Heated floors and towel warmers add electrical demand, while bidet seats, lighted mirrors and in-drawer outlets need dedicated circuits. Your electrician should review the full list.
Think carefully about outlet placement. A water closet may need an outlet for a smart toilet or bidet, and an outlet may need a lower position near a vanity seating area. Decide these early, because moving them later means opening finished walls.
Ventilation also needs a plan, including exhaust fan sizing. Moisture control protects paint, drywall and framing, so the fan should suit the room and discharge properly. Your local building department can confirm requirements.
Permits and inspections depend on local code. Permit drawings must show existing conditions and proposed construction, so the floor plan you drafted earlier is useful here. Confirm requirements before work starts.
Bathroom Remodel Order of Work Step by Step
The bathroom remodel order of work runs from demolition through rough-in, waterproofing, tile, paint and finishes, ending with accessories. The sequence matters because each step depends on the previous one: waterproofing goes before tile, and paint goes before the vanity. Following it avoids damaging finished work.
Shower enclosures, pans and bathtubs are installed before flooring, except clawfoot tubs. Paint walls before installing the vanity, backsplash tile and flooring. These dependencies help you plan the timeline, because delays at one stage move everything after it.
Use this sequence as a schedule outline: inspect and repair after demolition, rough in and close walls, waterproof and test, then finish tile, paint and fixtures. Each step is explained in the sections that follow.
- Demolition and inspection
- Rough-in and drywall
- Waterproofing and testing
- Tile, paint, finishes
Demolition and Inspection
Begin by turning off the main water supply, removing old fixtures and clearing flooring and debris. Once cleared, inspect plumbing and electrical wiring before replacing anything. Check exposed framing for water damage, rot or wiring problems, and repair the subfloor if needed.
Self-demolition is messy, time-consuming and potentially dangerous. Hidden hazards can appear once surfaces come off. Inspection comes first because problems are easier to fix while open, before new materials cover them.
Rough-In Plumbing, Electrical and Drywall
Do rough-in plumbing and electrical updates while walls are open, then replace drywall. Sheetrock and subfloor must suit a wet bathroom before materials are installed, and cement backer is used in wet zones. Check the subfloor is suitable for wet areas.
Inspections matter at this stage. An electrical inspector signs off a plumbing-related permit before walling up, so schedule inspections before closing the walls. Closing too soon can mean tearing finished work open.
Waterproofing and Flood Testing
Waterproof wet zones with cement backing boards and a multi-coat liquid membrane such as RedGard or a Schluter system, then flood test the shower pan for 24 hours before tiling. Run the membrane a few inches up the wall beneath tile baseboards. Follow the manufacturer’s directions for coats and drying. The test confirms the pan holds water.
A flood test exposes leaks while repairs are still simple. After tile, any leak is far more expensive to fix. Keep the test duration in your schedule, since tile cannot start until it passes.
Tile, Paint and Finish Installation
Install shower wall tile first, then shower floor tile, paint the walls, install the vanity and plumbing fixtures, and finish with hardware, lighting and glass doors. Grout and seal as the tile requires. Install shower doors after tiling for accurate alignment. Painting before the vanity prevents damage to the cabinet.
This order protects finished surfaces from drips, scratches and installation damage. Fixtures and accessories go last so they stay clean. Keeping to the sequence also avoids rework. Final checks confirm everything operates properly.
Common Bathroom Remodel Planning Mistakes
Common planning mistakes include underbudgeting, skipping a contingency, buying tile in batches and ordering fixtures after rough-in. Each leads to delays or extra cost. Careful upfront planning saves time and money later, because many errors are costly once walls are closed.
Short tile orders can yield new tile with different color or veining. Late fixture orders can conflict with the rough-in, forcing changes to pipes or wiring. Ignoring outlets and ventilation causes comfort and moisture problems.
Moving plumbing unnecessarily raises labor and piping costs. Using porous stone in showers invites staining, and skipping the 24-hour flood test risks hidden leaks. These are avoidable with planning.
Treat the budget, drawings and orders as one system. A change in one affects the others, so update all of them together. That keeps the project predictable.
Final Pre-Construction Planning Checklist
Before construction, confirm scope, budget, measurements, fixture specifications, permits, materials on hand and timeline. Also decide whether the project is DIY or hired out and note the approximate bathroom size. This final review catches gaps while changes are cheap. It turns planning into a workable schedule.
Obtain written estimates before signing a contract. Written scopes make comparison easier and reduce disputes. Confirm what is included and what is excluded.
Spec sheets list measurements to verify against an existing fixture location. Check them against your floor plan, including door swings and clearances. A mismatch is easier to fix before ordering.
Confirm that materials are on hand or on order, including tile with overage. Check lead times for tubs and made-to-order items. Then set the timeline around inspections and drying times. With these confirmed, demolition can begin.