Book Appointment Now

Bathroom Remodel Order of Operations: The Correct Sequence
The correct bathroom remodel order of operations is planning and permits, demolition, rough-in, inspection, closing walls and waterproofing, tile, paint, fixtures, and a final walkthrough. The sequence exists because hidden work always comes before finishes. Pipes, wiring and ventilation sit behind surfaces, so any mistake found after tile or paint goes on means tearing out finished work and paying twice.
Not every project uses every phase. A cosmetic refresh changes surfaces and fixtures, a mid-range update replaces tile, cabinetry and fixtures in the existing layout, and a full gut renovation strips the room to the studs. The scope you choose decides which steps apply, but the logic stays constant: decide first, build what is hidden next, and finish visible surfaces last, moving from initial planning to final styling in a structured way.
What Is the Correct Order of a Bathroom Remodel?
The correct order has seven phases, each protecting or enabling the next one, and skipping or reshuffling them is what causes costly rework. Pipes, drains and wiring are updated or moved before walls are closed, and surfaces are finished only after the waterproofing beneath them is complete. A cosmetic refresh skips demolition, rough-in and backer or waterproofing work, because those phases only matter when walls and floors are opened. The seven phases follow in order below.
Dependency is the guiding idea. Planning fixes fixture positions, which tells plumbers and electricians where to work. Inspections must happen while everything is visible, so walls close only afterward. Tile needs a waterproof, stable surface, and paint belongs after tile to hide stray mortar or scuffs. Fixtures and trim-out come last because they are the easiest items to damage, and the walkthrough confirms that everything works. Treat the list as a chain: moving one link earlier usually forces repeated work later.
- Planning, design and permits
- Demolition
- Rough-in
- Framing, backer and waterproofing
- Tile and flooring
- Paint and fixtures
- Final walkthrough
Planning and Design Before Any Work Begins
Planning and design come first because they lock every decision that later trades depend on. Layout, fixture choices and permits drive the rough-in work, and rough-in in turn shapes tile, cabinetry and trim. When decisions are settled in advance, each tradesperson can work in sequence without waiting or guessing. Changing a decision after work starts usually means rework.
Scope and budget should be defined before anyone chooses finishes. Otherwise attractive materials can quietly push the budget beyond what the project can carry. Knowing whether you are refreshing, updating or gutting the room tells you which phases you need to plan and pay for. This stage also covers research on permits and a realistic view of how long deliveries and inspections may take. Good planning reduces surprises, though no plan removes every unknown.
Fixture positions need to be set early because they determine where supply lines, drains and electrical circuits go. Moving plumbing or walls significantly increases costs, so the cheapest plan usually keeps major fixtures near their current connections. Any relocation should be priced during planning, not discovered once walls are open. The sections below cover scope, layout, ordering and permits in turn.
How Do You Define Scope and Budget?
Define scope by choosing between a cosmetic refresh, a mid-range update or a full gut renovation, then build a budget around that choice. The budget should include materials, labor, permits and a contingency of 10 to 15 percent for surprises.
Scope determines which phases apply. A refresh skips demolition and rough-in, while a gut renovation uses every phase. The main cost drivers are moving plumbing or walls, the finish level of tile and cabinetry, and the amount of trade labor involved. The contingency matters because water damage or outdated wiring discovered at demolition can add work that nobody could price in advance. Setting the scope before choosing finishes keeps the budget honest.
Why Finalize the Layout Before Ordering Anything?
Finalize the layout first because fixture positions set the plumbing and electrical work, and moving plumbing or walls significantly increases costs. Where possible, position fixtures to align with existing plumbing, or price pipe relocation before committing.
Room size shapes the choices. A small bathroom has little room to shift fixtures, while a larger one allows more freedom but costs more to rework. Some layout changes need a structural engineer and may require changing a beam, so involve one before you commit to removing or moving walls. Ordering vanities, tubs or tile before the layout is final risks buying items that no longer fit the plan. Settle the drawing first, then buy.
When Should You Order Materials and Fixtures?
Order materials and fixtures early, before work begins, so everything is on site when each phase starts. Vanities, tile, faucets, shower valves and lighting should be ordered first. Rough-in dimensions depend on the fixtures you choose, so the plumber needs final selections to place valves and drains correctly. Late choices can stall the entire schedule.
Some items have long lead times, which custom options extend further. That can mean ordering weeks or months ahead, especially for custom vanities, cabinetry or special tile. Checking delivery estimates during planning prevents the project from outrunning its materials. Delays are costly because crews that arrive without materials sit idle or leave for other jobs.
Arrival of materials before demolition has practical benefits beyond timing. You can inspect each box for damage or wrong sizes while returns are still easy. Tile quantities and shower valve specifications can be verified before anything is installed. Storing items safely and dry in another room protects them from dust and demolition debris. Order early, confirm everything, and then start work.
Do You Need a Permit for a Bathroom Remodel?
You usually need a permit when a remodel alters framing, electrical or plumbing, but local rules decide, so confirm requirements with your building department. In Charleston, permits are required for plumbing, electrical and structural changes and for new bathroom additions.
Cosmetic work without plumbing or electrical changes typically needs no permit in Charleston. Replacing paint, accessories or a vanity in the same location is a different matter from moving a drain. A change to wiring or supply lines moves the project into permitted territory. Other places have their own thresholds, so verify requirements locally before assuming anything. The building department can clarify what applies.
Permits matter for sequencing because they attach inspections to the schedule. Rough-in inspections must be passed before walls close, and a final inspection signs off on permitted work at the end. Pulling permits during planning keeps the schedule realistic and avoids stop-work problems. Skipping them can complicate approvals and force opened-up work.
Demolition and Site Preparation
Demolition strips the bathroom to a state where mechanicals can be inspected or replaced. The safe sequence is utilities off first, then fixtures cleared, then surfaces removed.
Site preparation matters as much as tearing out. Protect adjacent areas with plastic sheeting and use safety gear during demolition, since dust and debris travel quickly through a home. The goal is not destruction for its own sake but exposure of pipes, wiring and framing so that later work rests on sound hidden components. Careful demolition also avoids damaging parts you intend to keep.
How Do You Shut Off Utilities Safely?
Turn off the main water supply, drain the lines, and cut power to the bathroom at the breaker before any demolition starts. Draining the lines leaves less water to spill when pipes are disconnected, and cutting power removes shock risks around wiring that may be old or concealed. Do both before touching a fixture.
Verify that circuits are dead before working near them. Switching a breaker off is not proof, so check the wires with an appropriate tester. Label the breaker so nobody switches it back on during work. These steps keep the work area safe for everyone involved.
Protect the rest of the house before removal begins. Adjacent areas should be covered with plastic sheeting, and anyone doing demolition should wear safety gear. Dust masks, eye protection and gloves are sensible because tile, drywall and old materials create sharp debris and fine dust. A bit of preparation prevents cleanup and injuries later.
What Gets Removed and in What Order?
Remove accessories, mirrors, the toilet, vanity and tub or shower unit first, then flooring, wall tile and damaged drywall or backer down to the studs. Stripping to studs is appropriate when you are inspecting or replacing mechanicals.
Opening surfaces often reveals hidden problems: outdated plumbing, old wiring and moisture damage behind walls. Water damage or outdated wiring can slow progress once surfaces are opened, so repairs may change the schedule and budget. Inspect each exposed area before moving on, and make decisions before rough-in begins. This is why a contingency is useful.
Control debris and dust throughout. Bag and remove material regularly instead of letting it pile up, and keep doors closed or sealed with plastic. A clear, clean workspace helps plumbers and electricians see what they are dealing with. The work follows this order:
- Accessories and mirrors
- Toilet and vanity
- Tub or shower unit
- Flooring and wall tile
- Damaged drywall or backer
Rough-In Work and Inspections
Rough-in is the work done inside open walls and floors before they are closed, including plumbing, electrical and ventilation. Plumbing, electrical and structural changes occur while walls are open, because later access would mean cutting into new finishes.
The order is plumbing and electrical first, ventilation next, and inspection before closing. Trades should coordinate, since a drain placement may affect wiring or framing. Working in the right order prevents one trade from undoing another’s work. The job is only done when everything is checked.
Rough-in is where design decisions become physical. Valve heights, drain locations, circuit counts and fan ducts all get fixed here, which is why the layout and fixtures must be final before it starts. Once inspected and approved, the room is ready to be closed. After that, changes become expensive.
Plumbing and Electrical Rough-In
Plumbing and electrical rough-in means rerouting water supply lines and drain pipes and running new circuits for lighting, exhaust fans or heated floors. Licensed professionals adjust supply lines for sinks, showers and toilets during this stage.
Shower valve and drain positions must be set before walls close, since they cannot be moved afterward without demolition. Coordination between trades matters: the plumber and electrician should agree on routes before framing is closed. New circuits give lighting, fans and heated floors the power they need. Everything stays exposed for inspection.
Ventilation and Exhaust Fan Upgrades
Install or upgrade the ceiling exhaust fan and ductwork before the ceiling is closed, because moisture control protects every new finish. The fan’s CFM rating should match the bathroom’s size so it can remove moisture and odors effectively.
Ducting should send exhaust air outside rather than into the attic or interior spaces. Venting into those areas just moves humidity elsewhere and can cause damage there. Doing this work while the ceiling is open makes routing simpler and cheaper. A properly sized, properly ducted fan helps new paint and grout last.
Why Pass Rough-In Inspections Before Closing Walls?
Pass required rough-in inspections before closing walls because the inspector needs to see open framing, pipes and wiring. Schedule the inspection with your municipality once rough-in is complete.
A failed inspection after drywall is installed means tear-out. The inspector cannot approve what is hidden, so closing walls early can force you to reopen them. Corrections made while walls are open are quick and inexpensive by comparison. Timing the inspection correctly saves real money.
The electrical inspector signs off on the permit before insulation and walling up proceed. That sign-off is the green light for the next phase. Inspection scheduling can affect timelines, so book early and keep the site accessible. Do not proceed until approval is in hand.
Closing Walls, Backer Board and Waterproofing
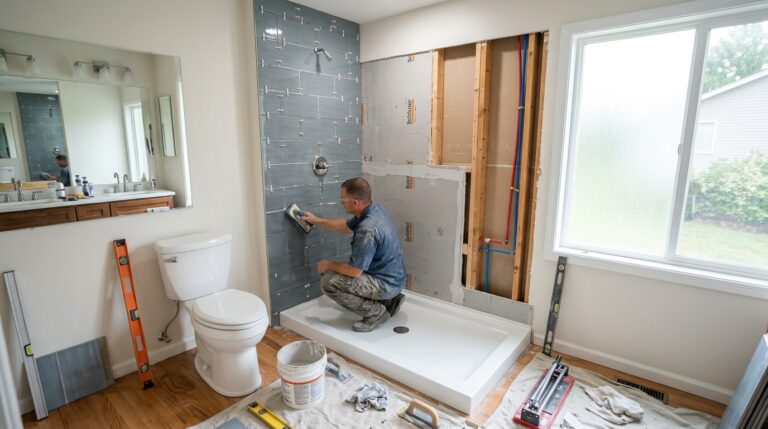
Once rough-in passes inspection, close the walls: install new insulation, then drywall or moisture-resistant cement board or backer panels on walls and ceilings. Green board, cement board and waterproof paints are designed for wet environments.
Wet zones need special treatment. Use moisture-resistant backer panels where showers and tubs sit, and add waterproofing membranes around wet zones before tile goes on. Standard drywall does not belong in these areas. Water behind tile eventually causes rot and mold.
The tub or shower base is set before wall finishing so that the wall materials and membranes overlap it properly. Insulation goes in before walls close, since it cannot be added afterward without opening them. Good sequencing here makes the waterproofing continuous, which protects the structure. Next comes the base itself.
How Do You Set a Tub or Shower Base Correctly?
Set a tub or acrylic shower pan by ensuring it is properly level and supported, then connect it to waterproofing membranes around wet zones. Do this before tiling so the wall materials can lap over its edges.
A level base lets water drain correctly and keeps tile lines true. Common mistakes include an unlevel base and gaps at the edges, both of which can allow leaks or cracked grout later. Check level in several directions before fastening anything in place. Corrections are easy now and hard later.
Test membrane integration at wet zones before tiling. A PVC waterproof pan liner, for example, is laid before shower tile. Seams, corners and transitions deserve extra attention. Some installers flood-test the pan to confirm it holds water. Only once the waterproofing is proven should tile begin.
Tiling, Grouting and Flooring
Tile follows waterproofing: shower walls, niches and floors are set with thin-set mortar and spacers once the surfaces beneath are ready. Planning the layout first helps the pattern fall evenly, and tiles should be laid differently for floors versus walls. Sequence matters as much as skill.
Shower walls and niches usually come first, with floor tile following, so you can work without damaging finished floors. Grouting and sealing complete the process after the mortar has cured. Rushing any of these steps risks loose tile or cracked grout. This stage takes patience and accurate planning.
How Do You Install Wall and Floor Tile?
Install wall and floor tile by planning the layout, spreading thin-set mortar, and placing tiles with spacers for even joints. Thin-set must be mixed to a consistent texture and applied before it dries out, and prepared surfaces need time to dry before tile is laid.
Follow these steps: Work in small sections so mortar stays workable, and check each tile for level and alignment. Allow curing time before grouting, since grouting too early disturbs setting tile. Walls and floors use different layouts, so plan each separately. Patience here prevents lippage and loose tiles.
- Plan the layout
- Mix thin-set
- Set tile with spacers
- Let mortar cure
Grout, Sealing and Silicone Joints
Apply sanded, unsanded or epoxy grout after the tile has cured, choosing epoxy for high durability in wet areas. Sanded grout suits wider joints, while unsanded grout suits narrow ones.
Seal the tile and transition joints with 100% silicone. Silicone is used where surfaces meet or move, such as corners and tub edges, because rigid grout can crack there. Flexible silicone absorbs the movement. Use it in place of grout at those joints.
Edge trim, such as Schluter-style profiles, covers exposed tile edges so raw tile is not visible. It gives a clean finished outline where tile ends. Install it as the tile is set, not afterward. This is a small detail that improves appearance and durability.
Maintenance extends the result. Annual grout sealing and proper ventilation preserve surfaces. Moisture and humidity are the main threats to grout and caulk. A working exhaust fan from the rough-in stage protects the work. Reseal each year to keep joints in good condition.
Painting and Fixture Installation
Painting is the surface finish stage that follows tile and precedes fixture mounting, and the ceiling, walls and trim are painted last among surface work. Painting last avoids repeated touch-ups after other work, since tradespeople inevitably scuff walls while working. Then come the major fixtures and trim-out.
Use moisture-appropriate paint, since bathrooms stay humid. Allow it to dry before installing fixtures that could be marked. This keeps the order clean: finish surfaces, mount fixtures, connect trim. Each step protects the previous one.
Why Paint After Tile but Before Fixtures?
Paint after tile to cover stray mortar marks and scuffs from tile work, but before fixtures so new pieces are protected from drips and damage. Ceiling, walls and trim all get painted at this stage.
Painting around installed vanities and toilets risks drips and awkward cut lines. It is simpler and cleaner with an empty room. Tiled surfaces should be taped off carefully. The result is a neat finish with less repair work.
Installing Major Fixtures
Install the vanity cabinet, countertop, sink, toilet with a new wax seal, and shower doors or glass enclosures after paint has dried. The vanity goes in before plumbing trim, because the wrong sequence forces redone work. Follow these steps: Glass enclosures and custom cabinetry have long lead times.
A glass shortage created a backlog in one project, so an enclosure needs a planned wait. Order early and expect the enclosure after other work. Schedule accordingly. Set the toilet on a new wax seal to prevent leaks. Check that fixtures are level and secure before connecting supplies. Mount carefully to protect finished tile and paint. Then move to trim-out.
- Vanity and countertop
- Sink
- Toilet with new wax seal
- Shower doors or enclosure
Electrical and Plumbing Trim-Out
Trim-out means hooking up light fixtures, vanity faucets, shower trims and mirror cabinets after the major fixtures are mounted. It differs from rough-in, which happens inside open walls. Trim-out is the final connection stage.
Electricians complete light fixture installation and test all outlets. Plumbers connect faucets and shower trims and check for leaks. Final connections and testing make sure each item works. Any problem goes on the punch list.
Doing trim-out last protects delicate finishes from damage. Faucets, trims and light fixtures are easy to scratch, so installing them at the end keeps them clean. Then the project is ready for walkthrough.
Final Walkthrough, Punch List and Sign-Off
The final walkthrough tests faucets, drains and switches for leaks or issues, followed by a punch list and clean-up before final payment. Final inspection signs off on permitted work before project completion, so schedule the final municipal building inspection. The punch list covers small items needing attention.
Walk through with the contractor, noting anything unfinished. Use this checklist: Withhold final payment until the list is complete. Then the project can be called done.
- Test faucets and drains
- Test switches and outlets
- Check for leaks
- Pass final inspection
How Long Does a Bathroom Remodel Take?
A bathroom remodel takes four to ten weeks or more of construction depending on scope. A cosmetic guest bathroom with no structural changes takes four to six weeks, and a mid-range master bath with new tile, fixtures and cabinetry but no plumbing relocation takes six to ten weeks. A full gut or high-end job with layout changes, custom tile and structural work takes ten to sixteen weeks of construction, plus design and permitting time.
Lead times, inspections and trade scheduling can extend any of these timelines. Hidden damage found at demolition adds more time. Ask contractors for confirmed durations in writing. Leave extra time for unforeseen problems.
Common Sequencing Mistakes and Challenges
The most common sequencing mistakes are ordering late, closing walls before inspection, and painting or installing before tile finishes. Each forces rework, as covered above. Avoid them with planning: Typical errors include: Hidden damage discovered at demolition and layout changes mid-project also disrupt schedules. The schedule should allow extra time for unforeseen problems or repairs.
A contingency fund helps absorb the cost. Settle design choices before work begins. Decide between DIY and hiring. Plumbing, electrical and extensive tile work typically need licensed contractor expertise. Homeowners can handle painting or demolition prep. Hiring trades for specialized work avoids errors and inspection failures. Match skill to task.
- Ordering fixtures late
- Closing walls before inspection
- Painting before tile finishes
- Changing layout mid-project